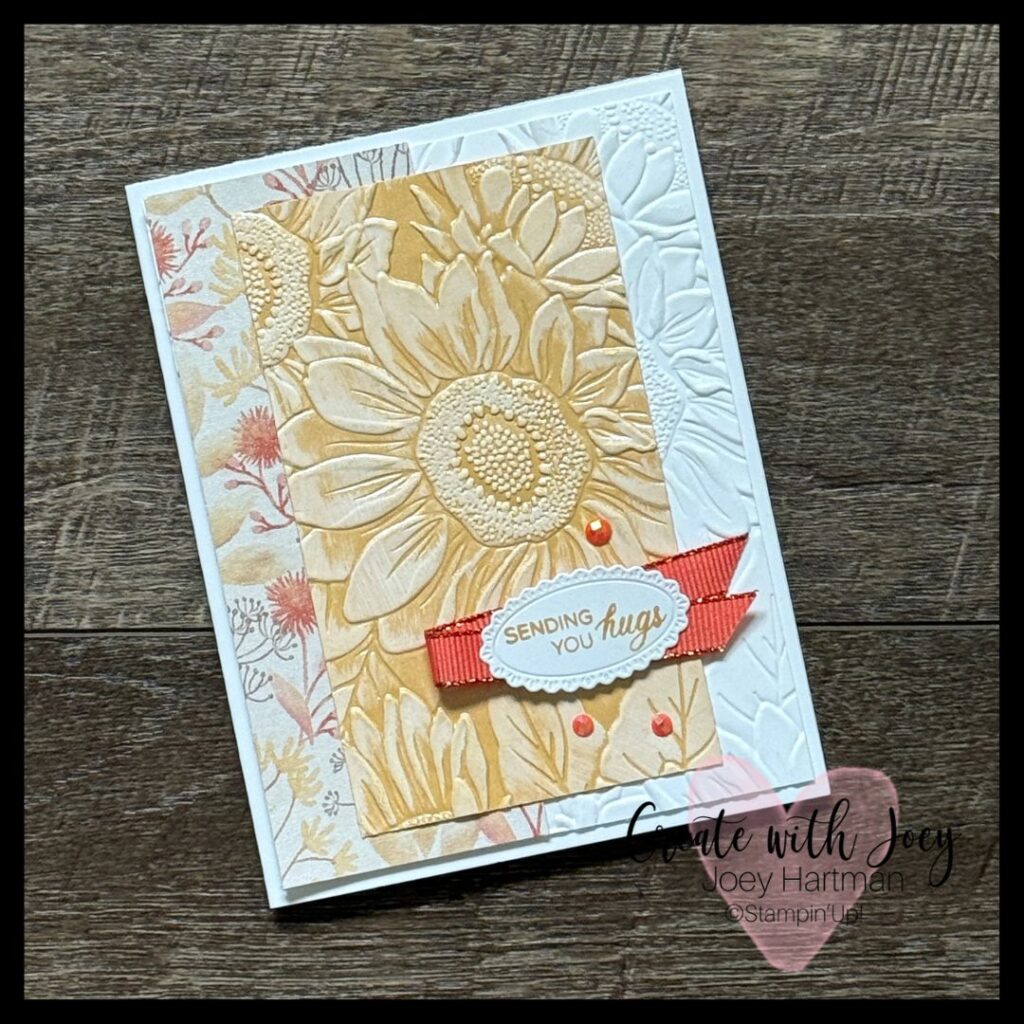
Sometimes the simplest technique can completely change the look of a card!
Today I’m sharing an easy way to bring out all the beautiful detail in your embossing folders using something you probably already have in your craft room — an ink pad.
For today’s card, I’m using the gorgeous Stampin’ Up! Sunflower 3D Embossing Folder. This folder has been incredibly popular — and it’s easy to see why. The deeply embossed sunflowers, leaves and centers create so much dimension that you really don’t need to add a lot to make a beautiful card.
But we’re going to make all of that texture stand out even more!
An Easy Way to Highlight Your Embossed Designs
I started with Golden Glow Pearlized Specialty Paper, which already has a beautiful shimmer.
After embossing it with the Sunflower 3D Embossing Folder, I lightly dragged a white ink pad directly across the raised areas of the embossed paper.
That’s it!
The white ink catches those raised portions of the design and highlights the petals, leaves and flower centers while leaving the Golden Glow color showing in the recessed areas.
The result is a beautiful dimensional background that looks much more complicated than it actually is.
A Few Tips for This Technique
The key is to use a light touch.
You aren’t trying to completely cover the embossed paper with white ink. Hold your ink pad fairly flat and gently skim it across the highest parts of the embossed design.
Start lightly — you can always go back and add more.
I also like to change the direction of the ink pad as I work across the panel. That helps catch different raised areas of the embossed image and gives the finished background a more natural look.
And don’t worry about making every flower exactly the same. A little variation is part of what makes this technique so pretty!
Try It With Embossing Folders You Already Own
One of my favorite things about this technique is that it isn’t limited to the Sunflower 3D Embossing Folder.
Take another look at the embossing folders you already have in your craft room. Florals, leaves, geometric patterns and other deeply embossed designs can all take on a completely different look when you add ink to the raised areas.
You can also change the effect simply by changing your paper and ink.
Try white ink over a darker cardstock for a soft, almost chalky effect, or experiment with another ink color over coordinating cardstock. Metallic and specialty papers can be especially beautiful because you get the contrast of the ink along with the shine of the paper underneath.
It’s an easy way to get even more creative mileage from supplies you already own.
Finishing Today’s Card
Because the embossed sunflower panel has so much detail, I wanted everything else on the card to enhance it rather than compete with it.
I added a strip of the new Glow of Harvest 12″ x 12″ Specialty Designer Series Paper, which is the new Product of the Month, and pulled the warm colors from the paper into the rest of the card.
The greeting is from the Phrases & Frames Bundle, and a little ribbon and sparkle finish everything off.
It’s still a fairly simple card — but that beautiful embossed background makes it look extra special.
Beautiful cards really can be made easy!
Watch the Video
Want to see exactly how I added the white ink to the embossed sunflowers?
Watch today’s video and I’ll show you the technique from beginning to end, along with all the details for putting the card together.
Get the FREE Project Sheet
I’ve also created a FREE Sunflower Project Sheet for today’s card.
It includes:
- A photo of the finished card
- Cutting dimensions
- Complete supply list
- Video tutorial link
Print it or save it with your card ideas so you can come back and try the technique whenever you’re ready.
Want to See What This Embossing Folder Looks Like in Copper Foil?
I couldn’t stop with just one!
I also used the Sunflower 3D Embossing Folder with Copper Foil and turned it into a beautiful easel card.
And there’s something else fun about this one — it includes a sneak peek of new Sunflower Designer Series Paper coming in the September catalog!
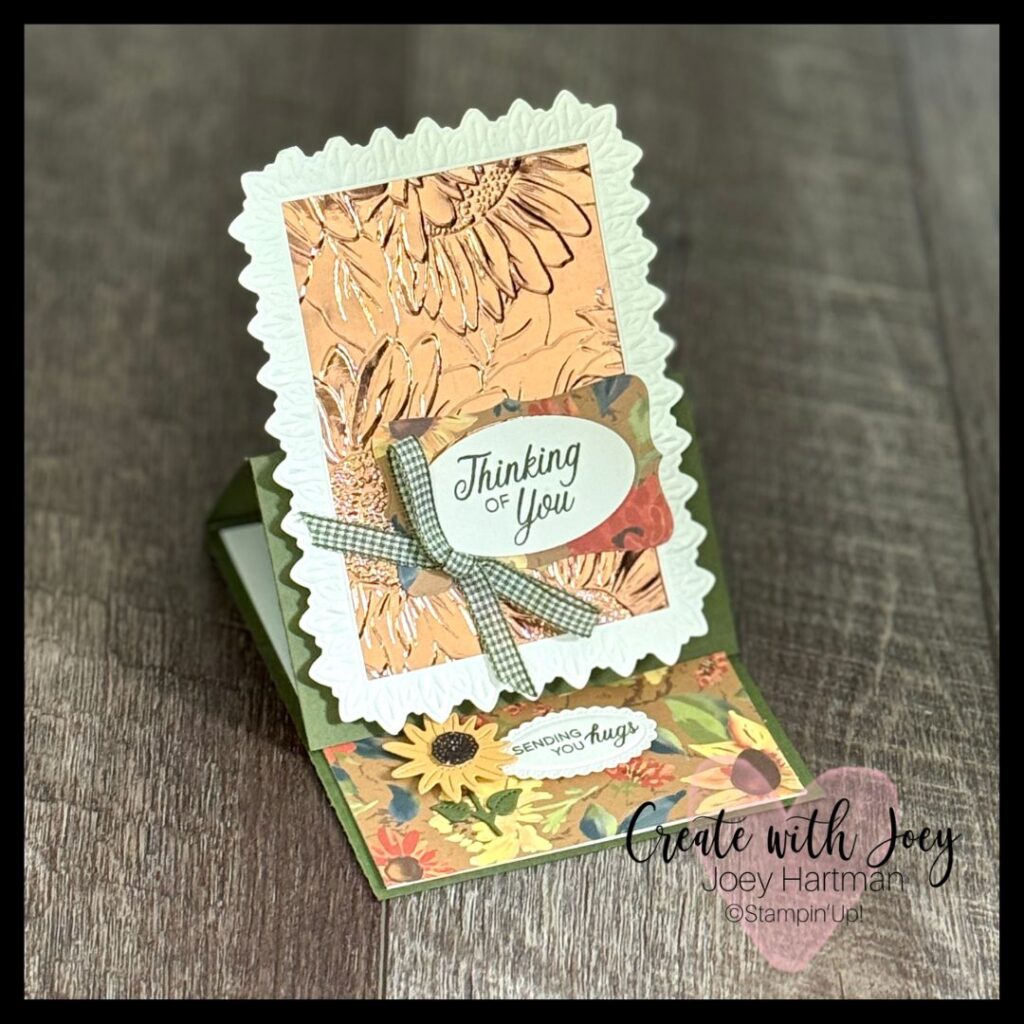
I’m creating a project sheet for this card too, but this one is a special gift for my email subscribers.
I’ll be sending the FREE Copper Foil Easel Card project sheet to my newsletter subscribers this Sunday.
If you’re already on my email list, watch your inbox!
Not a subscriber yet? There’s still time to join. Sign up before Sunday and I’ll send the project sheet right to your inbox along with my cardmaking ideas, tutorials, classes and other creative inspiration.
Double Stampin’ Rewards — August 19–21 Only!
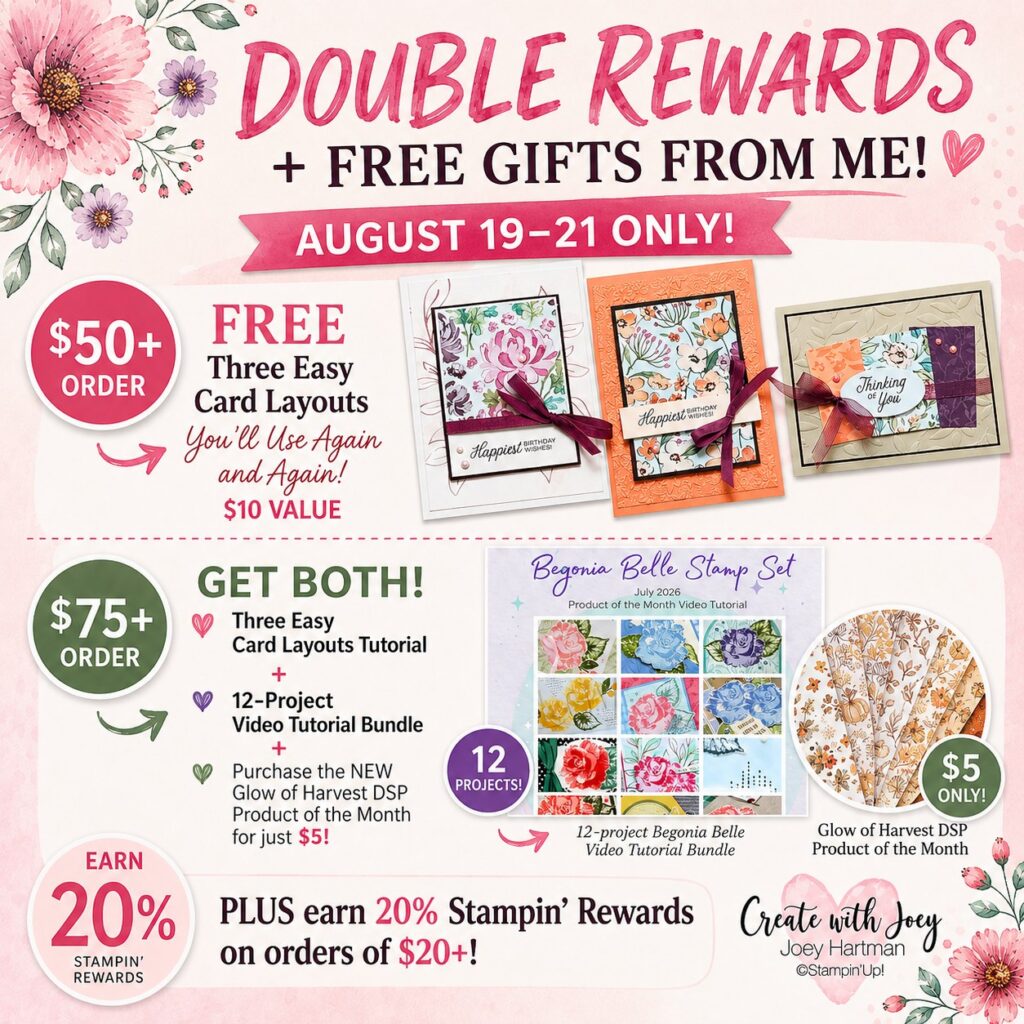
There’s also a great reason to shop this week.
For three days only, August 19–21, Stampin’ Up! is offering DOUBLE Stampin’ Rewards on qualifying orders of $20 or more.
Instead of the usual 10%, you’ll earn 20% in Stampin’ Rewards to use toward products you choose.
So if the Sunflower 3D Embossing Folder has been on your wish list — especially since it has sold out several times — or you have other products you’ve been waiting to order, these three days are a great time to do it.
I hope today’s card inspires you to pull out an embossing folder and try something a little different with it.
Sometimes all it takes is one ink pad and one simple extra step to make supplies you already love feel brand new again.
Hugs,
Joey
Create with Joey
Beautiful cards. Made easy.
